Lay every bottle on its side with the label facing out, keep the bottles you will open soonest at eye level, put large and heavy bottles on the bottom shelf, and leave a finger's gap at the back wall so air can circulate past the evaporator.
This page sits in Wine Storage Guides, where the rest of the category is compared the same way.
How this page is funded. Cork & Cool earns a commission if you buy through the Amazon links below, at no extra cost to you. It never changes the order of this list — see our editorial policy and affiliate disclosure. Prices come from Amazon and are refreshed daily; the price on Amazon when you buy is always the one that counts.
Our picks
Shelving is what makes a layout possible, so these three are the cabinets whose shelving the manufacturers document properly - fifteen removable slide-out shelves, documented shelf removal for wide bottles, and seven removable shelves in a 15-inch body.
How this page is funded. Cork & Cool earns a commission if you buy through the Amazon links below, at no extra cost to you. It never changes the order of this list — see our editorial policy and affiliate disclosure. Prices come from Amazon and are refreshed daily; the price on Amazon when you buy is always the one that counts.
#1 — Serious capacity, two zones
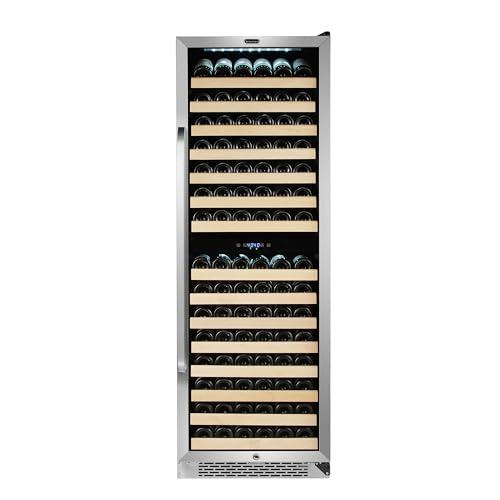
Whynter BWR-1642DZ
One hundred and sixty-four bottles split 86 above and 78 below, both zones covering the full 40-65°F range.
Thirty-three bottles in 14.75 inches, listed to NSF-7 and UL-471 for commercial premises — the one you buy for a bar, a rental or anywhere an inspector might look.
Illustrative photograph — not an image of the Summit SWC1535B.
Published specifications
Capacity
33 bottles
Zones
1
Cooling
compressor
Temperature range
41–64°F
Noise rating
Not published by the manufacturer
Installation
both
· Exterior: 33.88 in H x 14.75 in W x 22.75 in D
· Shelving: six slide-out wooden shelves; remove alternate shelves for wider Burgundy bottles
· Door: glass with stainless steel trim, reversible, factory-installed lock
· ETL-S listed to NSF-7 standards and meets UL-471 for use in commercial establishments
· Automatic defrost
· Weight: 77 lb
· ADA-height sibling sold separately as the ALWC15
Commercial listings that no other cabinet in this width carries
Floor space takes three wider bottles, which Summit states rather than leaving you to discover
Factory-fitted lock and a reversible door as standard
Rated for built-in or freestanding use and finished on all sides
What does not
Summit does not publish a decibel rating
The published range stops at 64°F, slightly short of the 65-66°F most rivals quote
Single zone
Who should skip it. Skip it if this is going into a home kitchen and nobody will ever ask about NSF listing — you are paying for commercial certification you will not use.
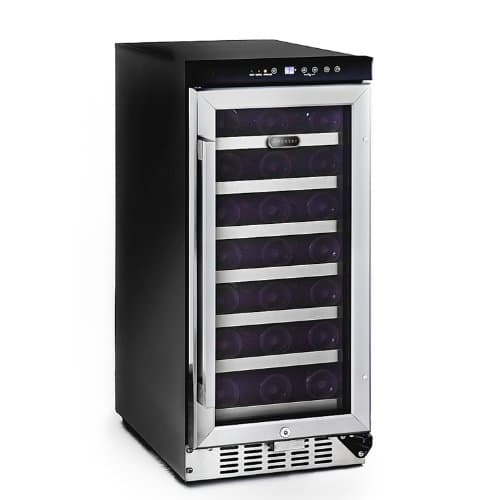
Thirty-three bottles in a 15-inch cabinet, with a published noise ceiling and seven wooden shelves — the capacity ceiling at this width, and the widest temperature band on this page.
Product photograph via Amazon.
Published specifications
Capacity
33 bottles
Zones
1
Cooling
compressor
Temperature range
40–72°F
Noise rating
42 dB
Installation
both
· Exterior: 15.0 in W x 22.5 in D (24.5 in with the handle installed) x 34.0 in H
· Capacity: 33 standard 750 ml bottles
· Noise published as "< 42 dBA" — a ceiling, not an average
Thirty-three bottles is the highest published capacity at this width
Whynter publishes a decibel ceiling, which almost nobody in this category does
Seven wooden shelves rather than the wire shelving usual at this price
40-72°F is the widest published band here, so it will also hold a bottle at room temperature
Rated for built-in or freestanding use, so an opening is optional rather than required
What does not
Single zone only — one temperature for the whole cabinet
The published figure is "< 42 dBA", a maximum rather than an average, so it cannot be compared like-for-like against a manufacturer quoting a flat number
At 15.0 inches published it is the widest cabinet in this group, which matters if your opening is tight
Depth grows to 24.5 inches once the handle is on, which is the figure that matters in a shallow run
33 bottles assumes standard Bordeaux shapes; a Burgundy-heavy collection will fit fewer
Who should skip it. Skip it if you need to serve whites cold and hold reds at cellar temperature in the same cabinet — one zone cannot do both. Skip it too if your opening measures under 15 inches, because this is the one cabinet here that needs the full module.
#ad — paid link. How this is funded. Price as of November 11, 2026; check Amazon for the current price.
The five layout rules
1. On their sides, always. Every cabinet on this site is racked for horizontal storage, and a cork that stays in contact with wine stays damp and sealed. The exception is sparkling wine for very short periods, and the full reasoning is in store wine flat or upright.
2. Labels facing out, neck to the right. Trivial-sounding and it is the rule that saves the most time. Pick one direction for every bottle and keep to it: you can read the whole cabinet at a glance instead of lifting bottles to identify them, and lifting bottles is the thing that disturbs sediment.
3. Heavy and large at the bottom. Magnums, Champagne and anything in heavy glass belongs on the lowest shelf. Two reasons: the cabinet is more stable loaded low, and a heavy bottle on a slide-out shelf at chest height is awkward enough that you will eventually drop one.
4. Drink-soon at eye level. The bottles you will open in the next month should be the ones you can reach without moving anything else. Everything you are keeping for years goes to the back and the bottom, where it will be left alone — which is exactly what it wants.
5. A gap at the back. Do not pack bottles against the rear wall. The evaporator and the airflow path are behind or above it depending on the cabinet, and a bottle pressed against the back can both block circulation and ice up. A finger’s width is enough.
Arranging a dual-zone cabinet
The useful split in a dual-zone cabinet is storage and service, not red and white. Both colors store at about 55°F; only serving temperature differs.
Storage zone at 55°F: everything you are keeping. Fill it properly, labels out, and leave it alone.
Service zone at 45–50°F: the whites and sparkling you will open in the next week or two, plus a couple of rose. Keep this zone deliberately under-filled, because it is the one you open and close.
Reds you want at 60–65°F for service: no cabinet gives you that, because cabinet ranges top out around 65°F and most reds then need an hour out of the cabinet anyway. Take the bottle out before dinner rather than trying to hold a serving zone at red temperature.
Which zone to make the cold one depends on the cabinet. Both Whynter dual-zone units carry the full 40–65°F range in both compartments, so the choice is yours. The Newair AWR-290DB fixes its upper zone at 40–55°F and its lower at 50–66°F, so the cabinet has already decided. Settings are in dual-zone temperature settings.
When to take a shelf out
Removing a shelf is the only way to make room for a bottle the shelf pitch was not designed for, and it is a deliberate trade: you lose the bottles that shelf held and gain a double-height bay.
Summit publishes the move for the SWC1535B — remove alternate shelves to take wider Burgundy bottles — which tells you the cabinet expects it. The Whynter BWR-1642DZ has fifteen removable wooden slide-out shelves and the BWR-1662SD sixteen, so there is plenty to work with. Plan the bays rather than improvising: a tall bottle needs the clearance permanently, so decide which shelf is coming out and leave it out.
What goes where in a typical cabinet
Position
What belongs there
Why
Bottom shelf
Magnums, Champagne, heavy glass, long-term reds
Stability, and the coldest, stillest part of most cabinets
Middle shelves
The working collection, labels out
Reachable without moving anything else
Eye level
Bottles for this month
The shelf you open most should hold the bottles you want most
Top shelf
Whites and sparkling in a single-zone cabinet
Warm air rises slightly, but the real reason is access frequency
Display shelf, where fitted
One or two bottles you want to see
A wire display shelf holds fewer bottles — spend it on presentation, not storage
Four mistakes that cost capacity
Packing to the rated number. A published capacity assumes standard Bordeaux bottles on every shelf. Hit that number and you have a cabinet that cannot take a case delivery and cannot be rearranged. Around 70–80% full is the working state, and the sizing arithmetic in what size wine fridge do I need assumes it.
Mixing bottle shapes on one shelf. A Burgundy bottle between two Bordeaux bottles wastes the space either side of it. Group by shape rather than by region and you will fit noticeably more.
Stacking bottles on top of each other. Tempting on a flat shelf, and it loads the bottom bottle’s shoulder against the shelf lip. Use the shelves you have, or take one out and lay a proper second layer.
Storing anything but wine in it. A wine cabinet does not dehumidify, because it is not meant to; food in a wine cabinet is food in a humid 55°F box. What a cabinet can and cannot take is covered in wine fridge for beer and soda.
Keeping track without an app
Once a cabinet holds more than about thirty bottles, memory stops working. Two low-effort systems that do:
Shelf by drinking window. Shelf 1 this year, shelf 2 next year, and so on down the cabinet, with the long keepers at the bottom. You never have to look anything up — the shelf tells you.
Neck tags. A paper or plastic tag on the neck with the year to drink by. Costs nothing, survives the humidity, and means you can read the whole cabinet through the glass without opening the door — which is itself worth something, since every opening is a load on the cabinet.
If the cabinet is full and the collection is still growing, the usual next move is a rack in a cool room for the long keepers rather than a second cabinet: best wine racks and how to store wine in a basement cover that split.
Two pages either side of this one. What the shelves themselves are — beech, wire, slide-out, full-extension, removable — and what each type does to a bottle is in wine fridge shelf types. And if the cabinet is new or has just been moved, load it only after the sequence in how to set up a new wine fridge.
Arranging well gets you closer to the published capacity, but never all the way there — how many bottles a wine fridge holds explains what the badge figure is measuring and what bottle shape costs you.
Questions people actually ask
▸ Should wine bottles touch each other in a wine fridge?
Touching is fine — the shelves are designed for it. What matters is not pressing bottles against the rear wall, where they can block airflow or ice up.
▸ Which shelf should white wine go on?
In a single-zone cabinet it makes little difference; put whites where you can reach them, usually the top. In a dual-zone cabinet put them in the service zone at 45–50°F.
▸ Can I store wine bottles upright in a wine fridge?
You can, and the cabinet is not designed for it. Horizontal storage keeps the cork damp; the exception is short-term storage of sparkling wine. See store wine flat or upright.
▸ How full should a wine fridge be?
About 70–80% of its rating. That leaves room to rearrange, to take a case delivery, and to pull a shelf out for a wide bottle.
▸ Does it matter which way the label faces?
Only for you — but consistently outward means you can identify every bottle without lifting it, and not lifting bottles is how sediment stays where it settled.